
If you’re dreaming of a dessert that marries creamy indulgence with rich chocolate and vibrant cherry notes, this Black Forest Ice Cream Cake is your ultimate treat. A luscious blend of velvety chocolate cake, swirls of premium ice cream, and jewel-toned cherries that’ll impress everyone at your next gathering! With an intermediate difficulty level, this showstopper dessert takes about 30 minutes of hands-on preparation, 30 minutes of baking, and a couple of hours of gentle chilling. Every slice of this frozen masterpiece clocks in around 450 calories, making it a decadent centerpiece for celebrations, dinner parties, or cozy family nights. From the first forkful, you’ll dive into a dreamy base of chocolate cake, layered with indulgent black cherry ice cream, followed by a silky vanilla layer and crowned with whipped cream, cherry pie filling, and chocolate curls. It’s a celebration of texture and flavour that feels both luxurious and comforting.
What makes this recipe so fun to assemble is how it turns a humble boxed cake mix into a gourmet delight, all while keeping the process approachable for home cooks. You’ll get to brush each cake layer with cherry liqueur or syrup for that hint of boozy warmth (or simply amplify the cherry sweetness if you choose syrup). Once the cake, ice creams, and garnishes come together, you’ll freeze the whole confection until it’s perfectly set, ready to slice into neat, show-stopping wedges. Whether you’re making this ahead for a big event or treating yourself to an impromptu indulgence, the rest time in the freezer is your friend. This frozen dessert sits beautifully on any table, inviting guests to gather ’round and marvel at its layered charm. So roll up your sleeves, prep your ingredients, and get ready for a taste adventure that fuses classic Black Forest flavours with summery ice cream delight!
KEY INGREDIENTS IN BLACK FOREST ICE CREAM CAKE
Behind every stunning slice of this Black Forest Ice Cream Cake is a handful of star players that bring texture, flavour, and a touch of elegance. From the base of rich chocolate to the light, airy whipped cream topping, each component works in harmony to create that signature balance of sweet and tart, cold and soft. Let’s dive into the heart of what makes this dessert so irresistible:
- Chocolate cake mix
A time-saving foundation that yields a moist, tender crumb. It provides the deep cocoa flavour and sturdy structure needed to support layers of ice cream and toppings without crumbling.
- Vanilla ice cream
Delivers a creamy, mellow counterpoint to the fruitier cherry layer. Its smooth richness helps balance the tartness of the cherries and adds a cool, luscious mouthfeel.
- Black cherry ice cream
Infuses bright, fruity notes and beautiful colour. The cherries bring an authentic Black Forest vibe, while the ice cream’s silky texture melds perfectly with the cake.
- Cherry liqueur or cherry syrup
A splash of liqueur introduces a subtle warmth and depth, while syrup boosts sweetness and helps soften the cake layers for easy slicing and uniform flavour throughout.
- Cherry pie filling
Brings whole cherry pieces bursting with tangy-sweet juice. It’s spooned on top of the whipped cream for a glossy, jewel-like garnish that celebrates the iconic cherry essence.
- Heavy whipping cream
Whipped into stiff peaks, this transforms into a cloud-like frosting. It lightens the overall dessert and frames the vibrant cherry topping beautifully.
- Powdered sugar
Sweetens and stabilizes the whipped cream, ensuring it holds its shape for attractive piping or spreading on every slice.
- Vanilla extract
Enhances the nuanced flavours of both the ice creams and whipped topping, adding aromatic warmth and complexity.
- Chocolate shavings or curls
Provide a final flourish of dark chocolate elegance. They add a hint of bitterness and a decorative contrast against the white whipped cream.
- Fresh cherries for garnish (optional)
A classic, vibrant accent that underscores the Black Forest theme. They offer a burst of freshness and gorgeous colour on the plate.
HOW TO MAKE BLACK FOREST ICE CREAM CAKE
Crafting this Black Forest Ice Cream Cake is a delightful process that combines baking, freezing, and a little bit of artistry. Follow these steps to build layers of cake and ice cream that will set beautifully in the freezer. With clear directions and simple techniques, you’ll end up with a stunning dessert that tastes as impressive as it looks.
1. Preheat your oven to 350°F (175°C) and prepare a 9-inch round cake pan according to the package instructions on your chocolate cake mix. Pour in the batter and bake until a toothpick inserted in the center comes out clean. Remove the cake from the oven and let it cool completely on a wire rack.
2. Once the cake has cooled, carefully slice it in half horizontally using a long serrated knife or cake leveler to create two even layers. This creates the perfect sandwich for your ice cream.
3. Line the same cake pan with a large piece of plastic wrap, leaving enough overhang to cover the top of the assembled cake. This makes removal easier after freezing.
4. Place one cake layer in the bottom of the pan. Brush it evenly with one tablespoon of cherry liqueur or syrup, ensuring each nook absorbs that delicious cherry essence.
5. Scoop the black cherry ice cream into the pan over the cake layer. Use a spatula to smooth it into an even layer, pressing gently to remove any air pockets. Freeze this layer until it’s firm, about 30 minutes.
6. Remove the pan from the freezer and add a layer of vanilla ice cream on top of the black cherry layer. Spread it evenly with a spatula. Place the second cake layer on top and brush with the remaining cherry liqueur or syrup.
7. Cover the cake with the plastic wrap overhang and freeze until the entire cake is solid, about 1 to 2 hours.
8. While the cake sets, whip the heavy cream with the powdered sugar and vanilla extract until stiff peaks form. This will be your decadent frosting.
9. Unwrap the cake and lift it out of the pan, placing it on a serving platter.
10. Spread or pipe the whipped cream over the top and sides of the cake, creating a smooth, cloud-like covering.
11. Using a spoon, drizzle the cherry pie filling over the whipped cream, letting it cascade naturally down the sides in some places.
12. Garnish the cake with chocolate shavings or curls and fresh cherries, arranging them artfully on top for that signature Black Forest look.
13. Slice and serve immediately, or keep the cake frozen until you’re ready to impress your guests.
SERVING SUGGESTIONS FOR BLACK FOREST ICE CREAM CAKE
Elevating the presentation of your Black Forest Ice Cream Cake can be just as fun as making it! Whether you’re hosting a backyard barbecue, celebrating a birthday, or simply treating yourself, thoughtful accompaniments and display touches can turn each slice into a moment to remember. Below are some creative ideas to enhance both the look and taste of every serving.
- Serve each slice on a chilled plate to keep the ice cream firm longer, and garnish with a fresh mint leaf for a pop of green that contrasts beautifully with the red cherries and white whipped cream.
- Pair your cake with a small scoop of homemade chocolate sauce warmed slightly, allowing guests to drizzle extra cocoa richness over the top for an indulgent finishing touch.
- Offer a side of mixed berry compote (blueberries, raspberries, blackberries) to complement the cherry flavours while adding a tangy, jewel-toned element to the dessert spread.
- Present individual slices with a dusting of cocoa powder or confectioners’ sugar, and tuck a sugared cherry stem into the whipped cream for that whimsical, elegant flourish that wows every time.
HOW TO STORE BLACK FOREST ICE CREAM CAKE
Once your masterpiece is created, keeping it fresh and flavourful is all about proper storage. Because this dessert relies on frozen layers, you’ll want to protect it from freezer burn and unwanted odours while maintaining the creamy texture. Here are a few tips and methods to ensure your cake stays party-ready:
- Wrap tightly in plastic wrap and foil: After decorating, wrap the entire cake snugly in plastic wrap. Then, cover with a layer of heavy-duty aluminum foil to prevent any air exposure and freezer burn.
- Use an airtight container: If your cake pan has a lid that seals, place the cake back inside. Otherwise, transfer slices into airtight containers, adding parchment paper between layers to avoid sticking.
- Keep at a consistent freezer temperature: Store the cake at 0°F (-18°C) or lower. Avoid door shelves where temperatures fluctuate; choose a spot in the main compartment of the freezer.
- Thaw properly before serving: When you’re ready to enjoy, move the cake to the refrigerator for about 15–20 minutes. This brief thaw time softens the ice cream just enough for perfect slicing without losing its shape.
CONCLUSION
This Black Forest Ice Cream Cake has taken us on a journey through luscious chocolate cake, creamy ice cream layers, tangy cherry accents, and fluffy whipped cream, all culminating in a dessert that’s equal parts stunning and satisfying. We’ve walked through every detail—from selecting and layering ingredients to freezing, decorating, and serving—so you can confidently recreate this showstopper in your own kitchen. With 30 minutes of hands-on prep, a quick bake, and a couple hours in the freezer, this Intermediate-level dessert is surprisingly approachable. It’s perfect as the grand finale to any meal or as a make-ahead treat for gatherings, birthdays, or spontaneous sweet cravings. At around 450 calories per slice, it’s rich and filling—an indulgence that’s well worth the love you’ll pour into each step.
Feel free to print this article and save it for later use, whether you’re planning a party or simply want a special dessert on standby. You’ll also find a handy FAQ section below to answer common questions about substitutions, storage, and more. If you try this recipe, please let me know how it turned out! I’d love to hear your tweaks, flavour experiments, or any challenges you encountered along the way. Your comments, questions, and feedback help me refine future recipes and share even more delicious ideas with our home-cook community. Enjoy every slice, and happy baking!
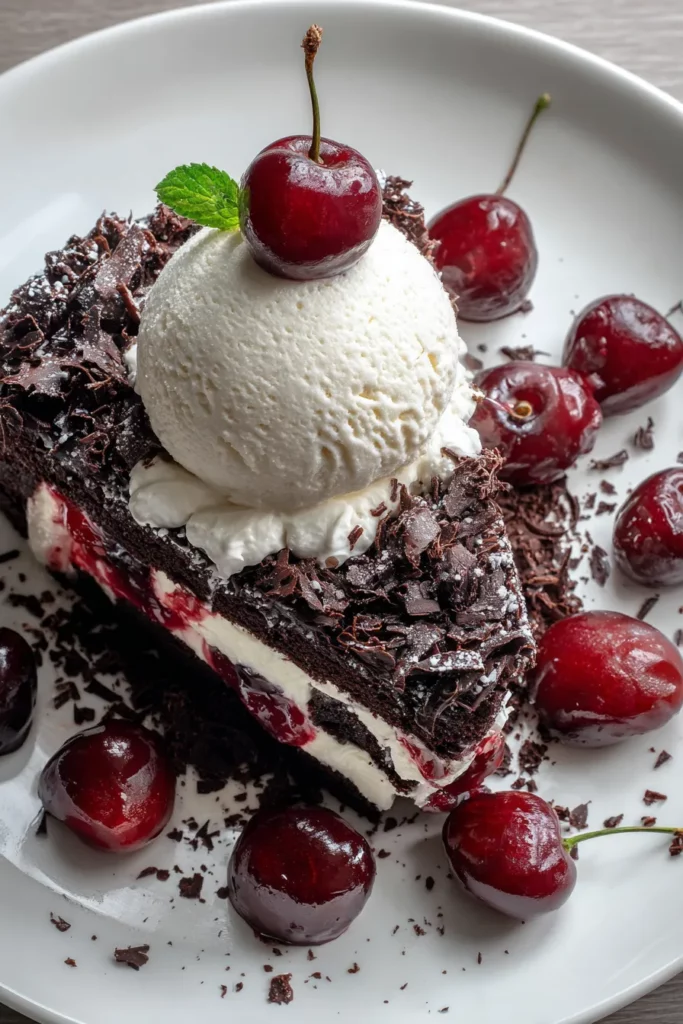

Black Forest Ice Cream Cake
Description
Experience a delightful mix of velvety chocolate and decadent ice creams, layered with sweet cherries. This Black Forest Ice Cream Cake is a showstopper for any occasion, guaranteed to satisfy your sweet cravings.
Ingredients
Instructions
-
Preheat your oven to 350°F (175°C) and prepare a 9-inch round cake pan according to the instructions on the chocolate cake mix package. Bake the cake and allow it to cool completely.
-
Once the cake has cooled, carefully slice it in half horizontally to create two layers.
-
Line the same cake pan with plastic wrap, ensuring enough overhang to cover the top of the cake once assembled.
-
Place one layer of the cake in the bottom of the pan. Brush it with 1 tablespoon of cherry liqueur or syrup.
-
Spread the black cherry ice cream evenly over the cake layer, smoothing it with a spatula. Place it in the freezer until firm, about 30 minutes.
-
Remove the pan from the freezer and spread the vanilla ice cream over the black cherry layer. Top with the second cake layer. Brush the top layer with the remaining cherry liqueur or syrup.
-
Cover the cake with the overhanging plastic wrap and freeze until the ice cream is firm, about 1 to 2 hours.
-
Before serving, whip the heavy cream, sugar, and vanilla extract until stiff peaks form.
-
Unwrap and remove the cake from the pan, placing it on a serving platter.
-
Spread or pipe the whipped cream over the top and sides of the cake.
-
Using a spoon, drizzle the cherry pie filling over the cream.
-
Garnish with chocolate shavings or curls and fresh cherries if using.
-
Slice and serve immediately, or keep frozen until ready to serve.
Note
- This cake can be prepared a day in advance and stored in the freezer. Just add the whipped cream and garnishes before serving.
- For a more intense chocolate flavor, use dark chocolate shavings or a bittersweet chocolate ganache.
- You can experiment with different types of ice cream for unique flavor combinations.
- Serve with extra cherry pie filling or chocolate sauce on the side for those who love more toppings.