

Tender coconut bites melt in your mouth, each crowned with a crackly powdered sugar coat and a hint of vanilla warmth. These Sweetened Condensed Milk Snowballs are delightfully chewy and quick to whip up—perfect for sharing at holiday parties or sneaking a sweet surprise into lunchboxes. Grab your mixing bowls and let’s dive into a recipe that’s as fun to make as it is to eat!
Key Ingredients
Before you start, make sure you have these simple staples on hand. Each one plays a key role in creating the perfect balance of texture and flavor.
- 1 cup unsweetened shredded coconut: brings chewy texture and a tropical flavor base.
- 1 cup powdered sugar: adds sweet binding power and forms that signature crackly exterior.
- 1/2 cup sweetened condensed milk: lends rich creaminess and helps hold the dough together.
- 1 teaspoon vanilla extract: infuses a warm, aromatic note throughout.
- 1/4 teaspoon salt: balances the sweetness and enhances overall taste.
- 1/2 cup all-purpose flour (or gluten-free flour for a gluten-free option): provides structure so the snowballs hold their shape.
- Optional: additional powdered sugar for rolling: creates an extra snowy, sweet finish before serving.
How To Make Sweetened Condensed Milk Snowballs
You’re just a few simple steps away from platefuls of chewy, coconut-packed snowballs. Follow this step-by-step guide to transform pantry ingredients into melt-in-your-mouth treats that are perfect for beginners and seasoned bakers alike.
1. Preheat your oven to 350°F (175°C) and line a baking sheet with parchment paper to ensure the snowballs don’t stick.
2. In a large mixing bowl, combine the shredded coconut and powdered sugar, then stir until fully incorporated and evenly coated.
3. In a separate bowl, whisk together the sweetened condensed milk, vanilla extract, and salt until the mixture is smooth and free of lumps.
4. Gradually add the wet mixture to the dry ingredients, stirring consistently with a spatula until the dough begins to come together.
5. Slowly sprinkle in the all-purpose flour, mixing just until a cohesive dough forms—take care not to overmix or you’ll lose tenderness.
6. Using your hands, scoop out tablespoon-sized portions of the dough and roll them into tight balls. Place each one on the prepared baking sheet about 2 inches apart.
7. Bake for 12–15 minutes or until the edges start turning golden brown; the centers will still be soft but will firm up as they cool.
8. Remove the baking sheet from the oven and let the snowballs rest for about 5 minutes before transferring them to a wire rack to cool completely.
9. If desired, roll the cooled snowballs in additional powdered sugar for that extra frosty look and sweetness.
Serving Suggestions
These snowballs aren’t just delicious—they’re a versatile treat you can serve in all sorts of delightful ways. Whether you’re hosting a gathering or packing a snack, here are some fun ideas to showcase your creations:
- Serve on a festive platter by arranging the snowballs on a red-and-green tray for holiday cheer.
- Pair with a cup of hot cocoa, letting the warm chocolate highlight the coconut’s sweetness.
- Pack in lunchbox treats, wrapping individual snowballs in parchment paper for a midday surprise.
- Dust on extra powdered sugar right before serving to refresh their snowy appearance and sweetness.
Tips For Perfect Sweetened Condensed Milk Snowballs
With just a few insider tricks, your snowballs will turn out perfectly chewy and sweet every time. Keep these friendly tips in mind as you bake:
- Store these snowballs in an airtight container at room temperature for up to a week.
- For a twist, you can add chopped nuts or mini chocolate chips to the mixture before baking.
- Consider adding a dash of almond extract for a different flavor profile.
- Perfect for holiday treats or as a sweet surprise in lunchboxes!
How To Store It
Proper storage keeps your snowballs tasting freshly made, whether you’re saving leftovers or prepping ahead for a party. Follow these simple methods to maintain their texture and flavor:
- Airtight container at room temperature: Place completely cooled snowballs in a sealed box or jar to keep them soft and flavorful for up to one week.
- Layer with parchment paper: When stacking, separate layers with parchment to prevent sticking and preserve the crackly sugar coating.
- Refrigeration option: If you prefer a firmer bite, store the airtight container in the fridge; bring to room temperature before serving.
- Freezing baked snowballs: For longer storage, freeze cooled snowballs in a freezer-safe bag for up to two months; thaw at room temperature and roll in powdered sugar again if desired.
Frequently Asked Questions
Got a few questions about these coconut snowballs? I’ve got you covered!
- How long does it take to prepare and bake these Sweetened Condensed Milk Snowballs?
The total time is about 30–35 minutes. Prep takes roughly 15–20 minutes to mix ingredients and shape the dough into balls, then baking requires 12–15 minutes. Allow an additional 5 minutes for initial cooling on the baking sheet and a few more minutes before serving if you choose to roll them in powdered sugar.
- Can I make the recipe gluten-free?
Yes. Simply substitute the 1/2 cup of all-purpose flour with 1/2 cup of your favorite gluten-free flour blend. Make sure the blend contains a binding agent like xanthan gum or guar gum for best texture. Follow the recipe exactly the same way, and your snowballs will turn out just as delicious.
- What should I do if the dough is too sticky or too dry?
If the dough is overly sticky and won’t hold its shape, add 1–2 tablespoons more flour (or gluten-free flour) and mix gently until it forms a cohesive ball. If it feels too dry and crumbly, drizzle in a bit more sweetened condensed milk—start with 1 teaspoon at a time—until it comes together without becoming soupy.
- How can I add variations or extra flavors to these snowballs?
You can stir in 1/4 cup of chopped nuts (like pistachios or almonds), mini chocolate chips, or dried fruit into the dough before shaping. For a different aroma, swap half of the vanilla extract with almond extract or add 1/2 teaspoon of coconut extract. Be mindful not to add too much extra moisture; adjust flour or condensed milk as needed.
- What is the best way to store leftovers, and how long will they stay fresh?
Store completely cooled snowballs in an airtight container at room temperature. They will stay fresh for up to one week. Place a piece of parchment paper between layers to prevent sticking. Avoid storing in direct sunlight or near heat sources to maintain their texture.
- Can I freeze the dough or baked snowballs?
Yes. For freezing dough, shape into balls and place them on a parchment-lined tray; freeze until solid, then transfer to a freezer-safe bag for up to 3 months. To bake, no need to thaw—add an extra 2–3 minutes to the baking time. You can also freeze fully baked and cooled snowballs in an airtight container for up to 2 months; thaw at room temperature and optionally roll in powdered sugar before serving.
- Why do the edges turn golden brown while the centers remain soft?
The shredded coconut and powdered sugar in the dough brown more quickly around the edges where heat is most intense. The centers retain moisture from the condensed milk and coconut, so they stay soft. This contrast of crisp edges and tender interiors is intentional. Letting them cool on the baking sheet for 5 minutes helps the centers firm up without overbaking.
What Makes This Special
This recipe is your ticket to perfectly chewy, coconut-kissed snowballs that are beginner-friendly and satisfy a sweet tooth in one bite. The sweetened condensed milk dynamics create a melt-in-your-mouth texture, while the powdered sugar coat adds that festive crunch. It’s fun to mix, bake, and share—plus, you can print this article and stash it in your recipe box for holiday baking marathons or quick treats anytime. Have questions or want to share your snowball success? Drop a comment below—I’d love to hear how yours turn out!
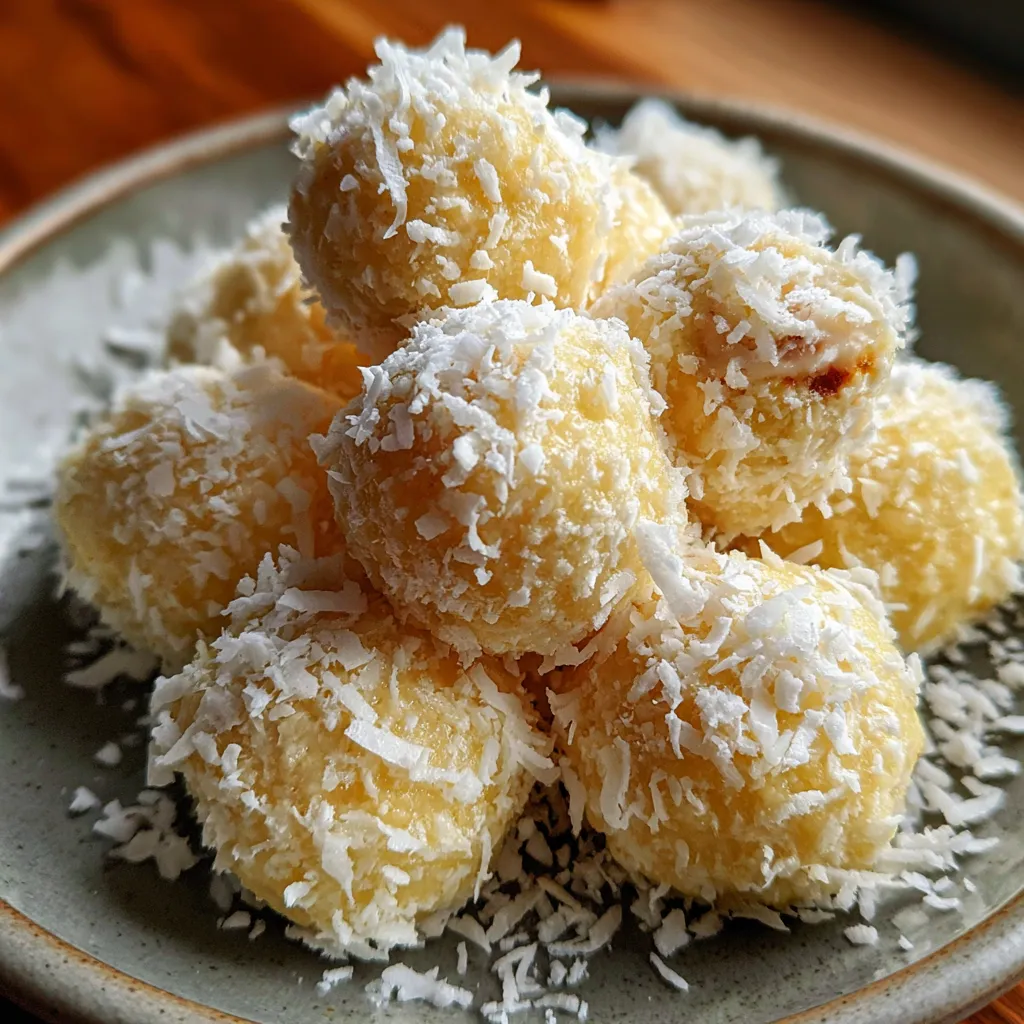

Sweetened Condensed Milk Snowballs
Description
Bite into tender coconut bites that melt in your mouth, each crowned with a crackly powdered sugar coat and a hint of vanilla warmth.
Ingredients
Instructions
-
Preheat your oven to 350°F (175°C). Line a baking sheet with parchment paper to prevent sticking.
-
In a large mixing bowl, combine the shredded coconut and powdered sugar. Mix until well combined.
-
In a separate bowl, whisk together the sweetened condensed milk, vanilla extract, and salt until smooth.
-
Gradually add the wet mixture to the dry ingredients, stirring consistently until the mixture starts to come together.
-
Slowly sprinkle in the all-purpose flour, mixing just until the dough forms a cohesive ball. Be careful not to overmix.
-
Using your hands, scoop out tablespoon-sized portions of the dough and roll them into balls. Place the balls on the prepared baking sheet, spacing them about 2 inches apart.
-
Bake for 12-15 minutes or until the edges start to turn golden brown. The centers might remain soft but will firm up as they cool.
-
Remove the baking sheet from the oven and let the snowballs cool on the baking sheet for about 5 minutes before transferring them to a wire rack.
-
If desired, roll the cooled snowballs in additional powdered sugar before serving for an extra touch of sweetness.
Note
- These snowballs can be stored in an airtight container at room temperature for up to a week.
- For a twist, you can add chopped nuts or mini chocolate chips to the mixture before baking.
- Consider adding a dash of almond extract for a different flavor profile.
- Perfect for holiday treats or as a sweet surprise in lunchboxes!