

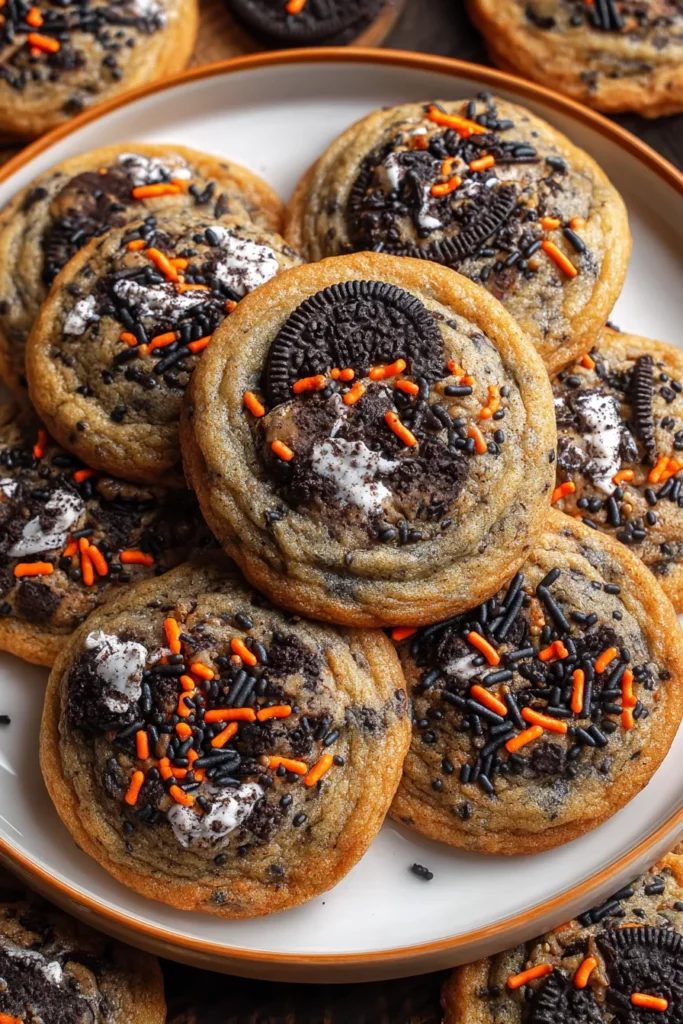
These Halloween Oreo Chocolate Chip Cookies are like a celebration in every single bite. As soon as you scoop the dough and see those colorful sprinkles peeking through, you know you’re onto something magical. This recipe blends the rich, chewy goodness of a classic chocolate chip cookie with the playful crunch of chopped Halloween-themed Oreos. With each forkful, you’ll taste the buttery sweetness of homemade dough mingling with pockets of melty chocolate and bites of cookie sandwich. Whether you’re gearing up for a spooky soirée or just craving a festive treat, these cookies deliver on flavor, fun, and that perfect hint of crunch.
What makes these cookies even better is how accessible they are for home bakers of all skill levels. Classified as a beginner-friendly dessert, you won’t need any advanced techniques or fancy equipment to whip up a batch in about 20 minutes of prep time and just 12 minutes in the oven. Let the cookies rest for 5 minutes on the baking sheet before transferring to a rack, and you’ll have around 150-calorie delights ready to satisfy your Halloween craving. The festive orange and black sprinkles are purely optional, but trust me—they elevate the visual fun to a whole new level. By the end of this article, you’ll feel confident bringing these spooky, festive cookies to life—no haunted mansion required. Get your mixing bowls ready, because a batch of warm, colorful, and utterly delicious Halloween Oreo Chocolate Chip Cookies is about to come out of your oven.
KEY INGREDIENTS IN HALLOWEEN OREO CHOCOLATE CHIP COOKIES
Before we dive into the step-by-step instructions, let’s chat about the star players that make these cookies shine. Each ingredient has a special job, from creating that rich, tender crumb to adding crunchy surprises with each bite.
- Unsalted butter: Provides a creamy, rich base and helps control the salt level so you can adjust seasoning to taste.
- Granulated sugar: Adds sweetness and contributes to a crisp edge as the cookies bake.
- Light brown sugar: Brings moisture and a subtle caramel undertone that keeps the centers soft.
- Eggs: Bind the dough together while adding structure and richness, ensuring every cookie stays delightfully chewy.
- Vanilla extract: Infuses warm, floral notes that deepen the overall flavor profile.
- All-purpose flour: The foundation of the dough, creating the perfect balance between tenderness and strength.
- Baking soda: Acts as a leavening agent, helping the cookies puff up just enough while maintaining a chewy texture.
- Salt: Enhances all the sweet elements and balances the flavors beautifully.
- Halloween-themed Oreos: Roughly chopped to deliver fun bursts of crunch and chocolate-cream flavor in every mouthful.
- Semi-sweet chocolate chips: Offer gooey pockets of melted chocolate that contrast wonderfully with the buttery dough.
- Orange and black sprinkles (optional): Playful decoration that adds a festive pop of color and tiny crunch.
HOW TO MAKE HALLOWEEN OREO CHOCOLATE CHIP COOKIES
Let’s walk through how to transform these simple ingredients into festive, crave-worthy cookies. Each step is designed for ease and enjoyment, so you can focus on that fun Halloween spirit.
1. Preheat your oven to 350°F (175°C) and line a baking sheet with parchment paper. This ensures even baking and easy cleanup.
2. In a large bowl, cream together the softened butter, granulated sugar, and brown sugar until smooth and creamy. This aerates the dough and creates a tender texture.
3. Beat in the eggs one at a time, ensuring each is fully incorporated before adding the next. Then add the vanilla extract and mix until well combined.
4. In a separate bowl, whisk together the all-purpose flour, baking soda, and salt. This distributes the leavening evenly and prevents pockets of baking soda.
5. Gradually add the dry ingredients to the wet ingredients, stirring just until combined. Overmixing can lead to tough cookies, so stop when you see no streaks of flour.
6. Gently fold in the chopped Halloween Oreos and semi-sweet chocolate chips, making sure they are evenly distributed throughout the dough for consistent bites.
7. Scoop tablespoons of dough and place them onto the prepared baking sheet, spacing each about 2 inches apart to allow for spreading.
8. Optionally, sprinkle orange and black festive sprinkles on top of each cookie dough ball for an extra pop of Halloween color.
9. Bake in the preheated oven for 10–12 minutes, or until the edges are golden brown and the centers are just set.
10. Allow the cookies to cool on the baking sheet for 5 minutes before transferring them to a wire rack to cool completely, locking in that perfect chewy texture.
SERVING SUGGESTIONS FOR HALLOWEEN OREO CHOCOLATE CHIP COOKIES
When it comes to showcasing these festive treats, presentation can turn a simple cookie into the highlight of your Halloween spread. Whether you’re hosting a spooky party or sharing with friends, these serving ideas will up the wow factor. With vibrant sprinkles, melty chocolate pockets, and crunchy Oreo bits peeking through, these cookies make a statement on any table. Let’s explore a few creative ways to serve them so every guest feels the Halloween magic.
- Milk and Cookie Bar: Arrange a variety of milk options—classic whole milk, almond milk, or even pumpkin spice latte—in decorative glass bottles. Set out the cookies on a rustic wooden board with small labels so guests can mix and match their favorite flavors.
- Spooky Dessert Platter: Lay down a Halloween-themed platter and alternate these cookies with other treats like candy corn, mini pumpkins, and ghost-shaped marshmallows. Dust the platter lightly with powdered sugar “webs” for a bewitching touch.
- Themed Gift Boxes: Scoop 3–4 cookies into small kraft paper boxes lined with orange tissue paper. Tie with black and white twine and add a mini plastic spider or a Halloween sticker for a delightful party favor.
- Warm with Coffee or Cocoa: Serve the cookies alongside steaming mugs of hot cocoa or spiced coffee. The slight crunch of the cookie against the velvety drink creates a cozy, autumnal experience that’s perfect for chilly evenings.
HOW TO STORE HALLOWEEN OREO CHOCOLATE CHIP COOKIES
Keeping these cookies fresh ensures each bite remains as delightful as the first. Whether you plan to bake ahead of time or have leftovers after a party, the right storage method will preserve that ideal balance of chewiness and crunch. A few simple tips can extend their shelf life without sacrificing flavor or texture, so you’ll always have a festive cookie ready when that October craving strikes.
- Airtight Container at Room Temperature: Place cooled cookies in a single layer inside an airtight container, separated by parchment paper if stacking. Store at room temperature for up to 4 days to maintain a soft center and crisp edges.
- Refrigeration: If you live in a warm or humid climate, refrigerate the cookies in an airtight container. They’ll stay fresh for up to one week, though the edges might firm up slightly—just bring to room temperature before serving.
- Freezing: For longer storage, arrange the baked cookies in a single layer on a baking sheet and freeze until solid. Transfer them to a freezer-safe bag or container, placing parchment between layers. Cookies will keep for up to 3 months—simply thaw at room temperature.
- Dough Storage: If you’d rather bake fresh batches on demand, portion the dough into balls, freeze them on a tray until firm, then transfer to a sealed container. Bake directly from frozen, adding an extra minute or two to the baking time for perfectly fresh cookies whenever you like.
CONCLUSION
Baking these Halloween Oreo Chocolate Chip Cookies is more than just following steps—it’s about creating a festive experience that combines simple ingredients with a dash of seasonal magic. From the soft, buttery dough to the crunchy chaos of chopped Oreos and melty chocolate chips, each bite offers a playful symphony of textures and flavors. With just 20 minutes of prep, 12 minutes in the oven, and a few minutes of resting time, you’ll have dozens of vibrant, 150-calorie treats ready to delight friends, family, or even yourself on a cozy autumn night. Whether you’re a seasoned baker or just starting out, this beginner-friendly recipe guides you smoothly from mixing bowl to cooling rack.
Feel free to print this article and save it for next year’s celebrations, or bookmark it for that last-minute Halloween party. You’ll also find a handy FAQ below to answer any questions about ingredient swaps, dough consistency, or baking tips. If you give this recipe a try, I’d love to hear how it turned out—let me know in the comments if you added your own twist, ran into any challenges, or simply want to share your cookie joy. Your feedback, questions, and personal stories are what make this baking community so special. Happy baking, and may your Halloween be sweet, spooky, and filled with delicious Oreo chocolate chip goodness!

Halloween Oreo Chocolate Chip Cookies
Description
These Halloween Oreo Chocolate Chip Cookies combine rich chocolate flavors with crunchy, themed Oreos for a treat that’s both fun and delicious, perfect for spooky celebrations.
Ingredients
Instructions
-
Preheat your oven to 350°F (175°C) and line a baking sheet with parchment paper.
-
In a large bowl, cream together the softened butter, granulated sugar, and brown sugar until smooth and creamy.
-
Beat in the eggs one at a time, then add the vanilla extract and mix until well combined.
-
In a separate bowl, whisk together the flour, baking soda, and salt.
-
Gradually add the dry ingredients to the wet ingredients, stirring until just combined and a dough forms.
-
Gently fold in the chopped Halloween Oreos and chocolate chips until they are evenly distributed throughout the dough.
-
Scoop tablespoons of dough and place them onto the prepared baking sheet, about 2 inches apart to allow for spreading.
-
Optionally, add orange and black sprinkles on top of each cookie dough ball for extra festivity.
-
Bake in the preheated oven for 10-12 minutes, or until the edges are golden brown.
-
Allow the cookies to cool on the baking sheet for 5 minutes before transferring them to a wire rack to cool completely.
Note
- These cookies are perfect for Halloween parties and gatherings.
- Feel free to experiment with different Oreo flavors for a unique twist.
- You can use a cookie scoop for even-sized cookies.
- To make the cookies extra spooky, consider pressing a candy eye or two onto the top before baking.