

Get ready for a hand-held indulgence with these decadent no-bake Samoa truffles. Each bite delivers velvety cocoa and creamy peanut butter dough, studded with toasted coconut and oozing with rich caramel, all enrobed in glossy chocolate. They’re surprisingly simple to make—no oven baking required—so you can whip up a batch whenever the craving strikes. Let’s dive into this easy yet luxurious treat and have some fun in the kitchen!
Key Ingredients
First things first: here’s what you’ll need to whip up these Samoa-inspired truffles and why each item is important for flavor and texture.
- 1 cup graham cracker crumbs: Provides a subtle sweetness and crisp base for the dough.
- 1 cup sweetened shredded coconut: Toasts to a golden crunch for that classic Samoa bite.
- ½ cup chocolate wafer crumbs: Adds deep chocolate notes and structure to the mixture.
- ½ cup powdered sugar: Sweetens and helps bind the dry ingredients.
- ½ cup unsweetened cocoa powder: Delivers rich chocolate flavor and a darker hue.
- ½ cup unsalted butter, softened: Brings creaminess and holds the dough together.
- ½ cup creamy peanut butter: Infuses nutty warmth and helps form a pliable dough.
- 1 tsp vanilla extract: Enhances all the chocolate and coconut flavors.
- ½ cup caramel sauce (store-bought or homemade): Fills each truffle with gooey sweetness.
- 1 cup semi-sweet chocolate chips: Melts into a smooth, shiny outer shell.
- 1 tbsp coconut oil: Gives the chocolate coating a glossy finish and easy dipping.
- Extra shredded coconut for garnish: Sprinkles on top for a pretty, crunchy finish.
How To Make Decadent No-Bake Samoa Truffles with Toasted Coconut and Rich Caramel
This recipe may look impressive, but it’s all about simple prep and assembly. You’ll start by toasting your coconut to bring out those nutty aromas, then mix a chocolate-peanut butter dough, shape it into truffles, fill with caramel, and finish with a glossy chocolate coating. Follow these ten steps, and you’ll have a batch of show-stopping treats in under an hour.
1. Preheat your oven to 350°F (175°C). Spread the sweetened shredded coconut on a baking sheet in one even layer. Toast for about 5–7 minutes, stirring every couple minutes, until the edges are lightly golden and fragrant. Watch it carefully to avoid burning. Remove and let cool.
2. In a large bowl, whisk together the graham cracker crumbs, chocolate wafer crumbs, powdered sugar, and unsweetened cocoa powder until fully combined and uniform in color.
3. Add the softened unsalted butter, creamy peanut butter, and vanilla extract to the dry mix. Using a spatula or clean hands, mix until a thick, cohesive dough forms.
4. Reserve about ¼ cup of the toasted coconut for garnish. Add the rest into the dough, then knead until the coconut is evenly distributed.
5. Scoop out roughly 1 tablespoon of dough, roll it into a ball, then use your thumb to press a small indentation in the center. Repeat until all the dough is used.
6. Spoon a little caramel sauce into each indentation, filling it just enough to see that irresistible ooze without overflowing.
7. In a microwave-safe bowl, combine the semi-sweet chocolate chips and coconut oil. Heat in 30-second intervals, stirring between each, until the chocolate is fully melted and smooth.
8. Dip each truffle into the melted chocolate, turning to coat completely. Lift with a fork and let excess chocolate drip off before placing on a parchment-lined baking sheet.
9. While the chocolate is still wet, sprinkle the reserved toasted coconut over each truffle for a beautiful topping.
10. Let the chocolate set at room temperature, or speed things up by chilling in the fridge for about 30 minutes. Serve chilled or at room temp.
Serving Suggestions
These truffles are party-ready and pair beautifully with warm or chilled beverages. Whether you’re hosting book club, surprising coworkers, or just treating yourself, presentation makes all the difference.
- Coffee pairing: Offer alongside a rich espresso or cappuccino to highlight the chocolate and coconut flavors.
- Elegant platter: Arrange on a decorative tray with fresh berries and mint sprigs for a stunning dessert board.
- Party favors: Wrap each truffle in clear cellophane tie with a ribbon for guests to take home.
- Ice cream topper: Chop leftover truffles and sprinkle over vanilla or coconut ice cream for an indulgent crunch.
Tips For Perfect Decadent No-Bake Samoa Truffles with Toasted Coconut and Rich Caramel
I love how these truffles let you play with flavors and textures. The key is balancing sweetness with the right crunch and ensuring the caramel stays gooey yet contained. Here are a few friendly pointers to make your batch shine:
- Drizzle extra caramel sauce over the set truffles before serving for an extra layer of gooey fun.
- Feel free to swap the peanut butter for almond, cashew, or sunflower butter to suit your taste—just pick a creamy, spreadable variety.
- Store your truffles in an airtight container in the fridge for up to one week so they stay fresh and firm.
How To Store It
Proper storage keeps your truffles tasting as fresh as the day you made them. Whether you’re saving leftovers or prepping ahead, these tips will maintain their flavor and texture.
- Refrigerator: Place truffles in a single layer in an airtight container. They’ll keep for up to one week.
- Freezer: On a parchment-lined tray, freeze truffles until firm, then transfer to a freezer-safe container for up to two months.
- Layer separation: If stacking, place parchment or wax paper between layers to prevent sticking.
- Room temperature: For short-term serving, keep truffles in a cool spot away from direct sunlight for up to 24 hours.
Frequently Asked Questions
Got questions? Here’s a quick FAQ to guide you through any hiccups while making these decadently delicious treats.
- How long does it take to prepare and assemble these no-bake Samoa truffles?
A: From start to finish, plan on about 45–60 minutes. Toasting the coconut takes 5–7 minutes, mixing and rolling the dough about 15–20 minutes, filling and dipping another 15–20 minutes, plus 30 minutes chilling for the chocolate to set (you can speed this up by using the fridge).
- What’s the best way to toast the shredded coconut without burning it?
A: Preheat your oven to 350°F (175°C). Spread the sweetened coconut in a single layer on a baking sheet, and stir every 2 minutes or so. Watch it closely—once the edges turn light golden and it smells fragrant (usually 5–7 minutes), remove it immediately and let it cool on the sheet.
- My mixture is too sticky or too crumbly—how do I fix the dough consistency?
A: If it’s too sticky, add a tablespoon at a time of graham cracker or chocolate wafer crumbs until it holds shape. If it’s too crumbly, soften the butter a bit more or stir in a little extra peanut butter until the dough comes together smoothly.
- Can I substitute the creamy peanut butter with another nut or seed butter?
A: Yes. Almond, cashew, sunflower, or even cookie butter work well. Just choose a spread that’s creamy and spreadable. Adjust sweetness or saltiness as needed since different butters vary in flavor and moisture.
- How do I ensure the chocolate coating is smooth and shiny?
A: Combine chocolate chips with coconut oil for a glossy finish. Melt in 30-second microwave intervals, stirring between each, until just smooth. Avoid overheating—stop as soon as the last bits melt to prevent seizing.
- What’s the proper way to store these truffles, and how long do they keep?
A: Place cooled truffles in an airtight container in a single layer (or separated by parchment) and store in the refrigerator. They stay fresh up to one week. Bring to room temperature a few minutes before serving for best texture.
- Can I make these ahead of time or freeze them for later?
A: Absolutely. You can assemble and freeze the truffles on a parchment-lined tray until firm, then transfer them to a freezer-safe container for up to 2 months. Thaw in the fridge overnight or at room temperature for about 30 minutes before serving.
What Makes This Special
These no-bake Samoa truffles hit all the right notes: a buttery, chocolatey dough, lush caramel centers, toasty coconut crunch, and a shiny chocolate shell that’s pure indulgence. They work because the flavors harmonize—sweet meets salty, creamy meets crisp—and you don’t even need an oven. Feel free to print this article and save it for later movie nights, potlucks, or whenever you need a quick homemade gift. If you try them out, let me know how they turned out or ask any questions—I'd love to hear your feedback and stories!
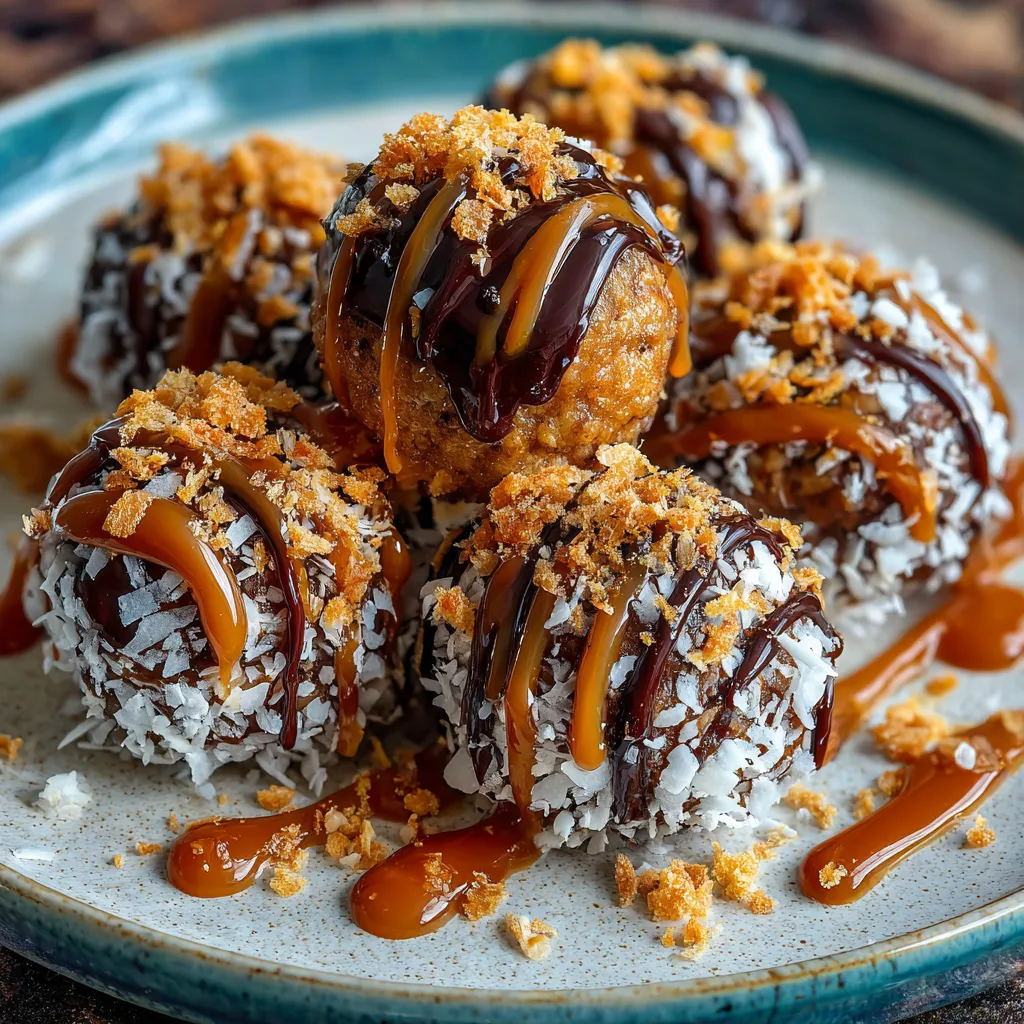

Decadent No-Bake Samoa Truffles with Toasted Coconut and Rich Caramel
Description
A handheld bite of velvety cocoa and peanut butter dough, studded with toasted coconut and oozing caramel, enrobed in glossy chocolate. Each truffle delivers a harmony of crunchy, creamy, and sweet.
Ingredients
Instructions
-
Begin by preheating your oven to 350°F (175°C). Spread the sweetened shredded coconut on a baking sheet in an even layer. Toast for about 5-7 minutes, stirring occasionally, until lightly golden and fragrant. Keep an eye on it to prevent burning. Once toasted, remove it from the oven and set aside to cool.
-
In a large mixing bowl, combine the graham cracker crumbs, chocolate wafer crumbs, powdered sugar, and unsweetened cocoa powder. Mix the dry ingredients together until fully combined.
-
Next, add the softened unsalted butter, creamy peanut butter, and vanilla extract to the dry ingredients. Using a spatula or your hands, mix everything together until a thick dough forms.
-
Take the toasted coconut and reserve about 1/4 cup for garnish. Add the remaining toasted coconut to the dough and knead it in until well incorporated.
-
Now, scoop out approximately 1 tablespoon of the mixture and roll it into a ball, then press your thumb into the center of each ball to create a small indentation. Repeat this process until all the dough is formed into truffles.
-
Once the truffles are formed, fill each indentation with a small amount of caramel sauce. You can use a teaspoon to help guide the sauce into the center.
-
In a microwave-safe bowl, combine the semi-sweet chocolate chips and coconut oil. Heat in the microwave in 30-second intervals, stirring after each interval until the chocolate is completely melted and smooth.
-
Dip each truffle into the melted chocolate, making sure to coat it fully. Use a fork to lift them out, allowing any excess chocolate to drip off before placing the truffles on a parchment-lined baking sheet.
-
While the chocolate is still wet, sprinkle the reserved toasted coconut on top of each truffle for garnish. Let the chocolate set at room temperature or place the truffles in the fridge for about 30 minutes to speed up the process.
-
Once the chocolate has set, your Samoa truffles are ready to be enjoyed! Serve them chilled or at room temperature.
Note
- For an extra touch, you can drizzle more caramel sauce over the set truffles before serving.
- Feel free to customize the type of nut butter used for different flavor profiles.
- These truffles can be stored in an airtight container in the refrigerator for up to a week.