

If you’re looking for a fun, no-fuss way to celebrate any occasion, these Birthday Cake Dessert Cups are your new best friend. Layers of fluffy yellow cake, silky vanilla pudding, and pillowy whipped cream studded with rainbow sprinkles and fresh berries in every spoonful make each bite feel like a mini party. With simple steps and make-ahead magic, you’ll be dishing out smiles in no time—so grab your cups and let’s get layering!
Key Ingredients
To create these irresistible cups, we’re keeping things delightfully simple. Each component brings its own textural or flavor boost, so gather everything before you start stacking.
- 2 cups crumbled yellow cake: Soft crumbs that form the base, absorbing pudding for a tender, moist bite.
- 1 package vanilla instant pudding mix: Turns into a creamy, stable layer that contrasts with the cake.
- 2 cups cold milk: Reacts with the pudding mix to create silky vanilla goodness.
- 1 cup heavy cream: Whipped into clouds of topping that crown each layer.
- 2 tablespoons powdered sugar: Sweetens and stabilizes the whipped cream for perfect peaks.
- 1 teaspoon vanilla extract: Infuses the whipped cream with extra warmth and depth.
- 1/2 cup rainbow sprinkles: Adds that iconic birthday flair and crunchy texture.
- 1/2 cup fresh berries: Brightens flavors and brings a juicy, tart finish.
How To Make Birthday Cake Dessert Cups
Bringing these dreamy cups together is all about layering textures and colors. You’ll start by whipping up the pudding and the cream separately, then simply alternate cake, pudding, whipped cream, and sprinkles until each cup is a little stack of celebration. Follow each step closely and you’ll have party-ready desserts in under half an hour.
1. In a medium mixing bowl, whisk the pudding mix and cold milk vigorously until it thickens into a smooth pudding consistency. Set aside to allow it to chill slightly.
2. In a separate bowl, beat the heavy cream, powdered sugar, and vanilla extract with an electric mixer until soft peaks form—this ensures light, fluffy whipped cream.
3. Spoon a generous layer of crumbled cake into the bottom of each serving cup, pressing lightly to create an even foundation.
4. Add a layer of the prepared vanilla pudding over the cake, smoothing the surface with the back of a spoon.
5. Top the pudding with a layer of whipped cream, spreading it gently to cover all edges.
6. Sprinkle rainbow sprinkles generously over the whipped cream for a festive pop of color and crunch.
7. Repeat the cake, pudding, whipped cream, and sprinkles layers if there’s room—finish with a final whipped cream dollop and a flurry of sprinkles on top.
8. Garnish each cup with fresh berries, nestling them into the whipped cream for a burst of natural sweetness.
9. Chill the dessert cups in the refrigerator for at least 30 minutes before serving so the layers set perfectly.
Serving Suggestions
Once chilled, these dessert cups are ready to shine at any gathering. Try these ideas to make them look as good as they taste:
- Serve in clear glass cups or small mason jars to showcase each colorful layer.
- Add a mini birthday candle on top of each berry for an extra festive touch.
- Pair with sparkling lemonade or fruit-infused water to balance the sweetness.
- Arrange on a tiered dessert stand so guests can admire the vibrant display.
Tips For Perfect Birthday Cake Dessert Cups
Creating flawless dessert cups is all about prep and presentation. With a few insider tweaks, your layers will hold their shape, and the flavors will be spot-on. Dive in with these friendly pointers to elevate each spoonful:
- These dessert cups can be assembled up to a day in advance and stored covered in the fridge.
- Swap the yellow cake for chocolate or funfetti cake for a different flavor.
- Use stabilized whipped cream for a firmer topping.
- Adjust sprinkle colors to match any party theme.
How To Store It
These cups are just as convenient as they are cute—perfect for prepping ahead or cleaning up afterwards. To keep each layer fresh and the whipped cream intact, follow these simple storage methods:
- Refrigerator: Place cups in an airtight container or cover individually with plastic wrap to prevent drying out.
- Advance Assembly: Layer everything except the fresh berries and sprinkles; add those just before serving for peak freshness.
- Freezer: If you must freeze, omit berries, freeze uncovered until set, then wrap each cup tightly. Thaw in the fridge and top with whipped cream, sprinkles, and berries.
- Room Temperature: Once chilled, serve within two hours at room temp to keep textures intact, especially on warm days.
Frequently Asked Questions
Got curiosities about these cheery cups? Let’s clear them up:
- How long does it take to prepare this recipe?
It takes about 20 minutes to assemble the dessert cups, plus at least 30 minutes of chilling time. This includes crumbling the cake, whisking the pudding, whipping the cream, and layering all components.
- Can I prepare these dessert cups in advance and store them?
Yes, you can assemble the cups up to a day in advance. Cover them tightly with plastic wrap or a reusable lid and store in the refrigerator. The layers will firm up while chilled, and you can add fresh berries and sprinkles just before serving for maximum freshness.
- What can I use if I don’t have rainbow sprinkles?
You can substitute rainbow sprinkles with any colored jimmies, nonpareils, or even crushed cookies that match your theme. For a more elegant look, use chocolate shavings, toasted coconut flakes, or chopped nuts.
- How do I prevent the cake layer from becoming soggy?
To avoid soggy cake, make sure to drain any excess moisture from fruit if you’re adding berries in between layers. Use chilled pudding (not too runny) and assemble just before serving or chilling. Also, avoid overwhipping the cream, which can release liquid, and serve within a day for best texture.
- Can I use stabilized whipped cream instead of homemade whipped cream?
Absolutely. Stabilized whipped cream made with gelatin or a commercial stabilizer will hold its shape longer, especially if you need the cups to last for several hours at a party. Just follow the stabilizer instructions, then layer it the same way you would regular whipped cream.
- What cake variations or flavor swaps can I try?
You can swap the yellow cake for chocolate, funfetti, red velvet, carrot cake, or even brownie crumbles. If you use a flavored cake, consider matching the pudding flavor—for example, chocolate pudding with chocolate cake or strawberry pudding with strawberry cake—for a harmonious taste.
- Can I freeze these dessert cups for later?
Freezing is possible but may alter texture. If you choose to freeze, assemble all layers except fresh berries, then freeze uncovered until firm. Once solid, wrap each cup tightly to prevent freezer burn. Thaw in the fridge for a few hours, then top with fresh whipped cream, sprinkles, and berries before serving.
What Makes This Special
What really sets these Birthday Cake Dessert Cups apart is the playful layering and pure joy in every spoonful. The combination of fluffy cake, creamy pudding, and whipped cream topped with sprinkles and berries takes all the elements you love about birthday cake and delivers them in adorable individual servings. They’re easy to prep, fun to customize, and perfect for any celebration—or just treating yourself. Go ahead, print this recipe, stash it for the next party, and don’t forget to drop your comments, questions, or deliciously colorful photos below if you give these cups a whirl!
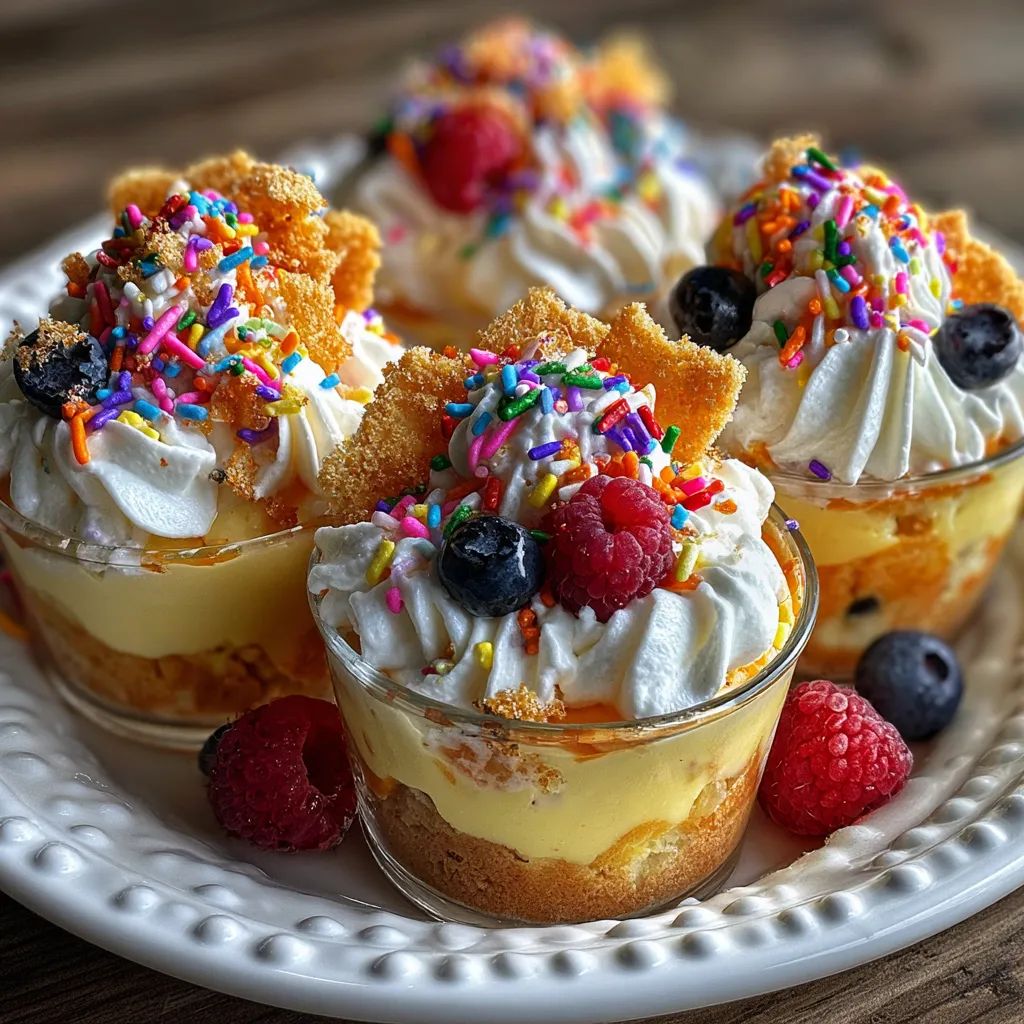

Birthday Cake Dessert Cups
Description
Creamy vanilla pudding meets soft cake crumbs and billowy whipped cream, all crowned with colorful sprinkles and juicy berries. Each chilled cup is a playful twist on birthday cake perfection.
Ingredients
Instructions
-
In a medium bowl whisk the pudding mix and cold milk until it thickens, then set aside.
-
In a separate bowl beat the heavy cream, powdered sugar, and vanilla extract until soft peaks form.
-
Spoon a layer of crumbled cake into the bottom of each serving cup.
-
Add a layer of prepared vanilla pudding over the cake layer.
-
Top the pudding with a layer of whipped cream.
-
Sprinkle rainbow sprinkles generously over the whipped cream.
-
Repeat the cake, pudding, whipped cream, and sprinkles layers if there’s room, finishing with whipped cream and a sprinkle topping.
-
Garnish each cup with fresh berries.
-
Chill the dessert cups in the refrigerator for at least 30 minutes before serving.
Note
- These dessert cups can be assembled up to a day in advance and stored covered in the fridge.
- Swap the yellow cake for chocolate or funfetti cake for a different flavor.
- Use stabilized whipped cream for a firmer topping.
- Adjust sprinkle colors to match any party theme.