

Egg fried rice has a way of turning leftover grains into a vibrant, satisfying meal that feels like a celebration in every bite. When you toss chilled, day-old rice into a shimmering pool of vegetable oil on a hot skillet, something magical happens: each tender grain achieves just the right balance of softness and slightly crisp edges. Golden, fluffy scrambled eggs swirl through the rice, weaving their rich creaminess into every spoonful. Sweet bursts of emerald peas, aromatic garlic, and delicate ribbons of translucent onion add pops of color and flavor that make each mouthful feel special. A generous splash of soy sauce brings deep umami notes, while a hint of toasted sesame oil lends a subtle, nutty depth. In less time than it takes to brew your morning coffee, you’ll have a plate so irresistible it might just become your new weeknight obsession.
Beyond convenience, this recipe is all about transforming simple pantry staples into a crowd-pleasing favorite. It’s the kind of dish that brings comfort without fuss—perfect for a busy lunch, a no-stress dinner, or even a casual weekend gathering. The versatility is endless: stir in chopped bell peppers for color, add shredded chicken for protein, or sprinkle on chili flakes for a spicy kick. Most importantly, it’s a canvas for your creativity, inviting you to make it truly your own. Gather your favorite wok, grab that leftover rice, and let’s dive into the world of quick, homemade restaurant-style egg fried rice that never skimp on flavor.
KEY INGREDIENTS IN 10-MINUTE EGG FRIED RICE
To make this 10-Minute Egg Fried Rice truly shine, each ingredient plays its part in building layers of aroma, texture, and taste. From the foundation of perfectly steamed rice to the finishing touch of vibrant green onions, here’s why every component matters:
- Cooked white rice
Cold, day-old rice is ideal because its grains separate easily, preventing a gummy texture. This firm base soaks up sauces and flavors while crisping up just enough for delightful bites.
- Eggs
Rich and silky, scrambled eggs provide both protein and a luxurious mouthfeel. They add color, body, and a soft contrast to the chew of the rice.
- Vegetable oil
A neutral-flavored oil with a high smoke point ensures the pan stays hot for even cooking. It helps the rice grains develop a slight golden edge.
- Onion
Finely chopped onion softens into sweet, translucent pieces that infuse the dish with depth and mellow sweetness.
- Frozen peas
These bright green kernels bring tender pops of sweetness and a playful texture, balancing the savory elements.
- Garlic
Minced garlic bursts with fragrant, pungent flavor. A quick sizzle releases its aromatic oils for that signature stir-fry essence.
- Soy sauce
This salty, umami powerhouse coats every grain with savory richness, creating that unmistakable “fried rice” taste.
- Sesame oil
Just a whisper of toasted sesame oil adds a nutty, toasty aroma that elevates the overall flavor profile.
- Ground black pepper
A light dusting provides gentle warmth and a hint of spice that cuts through the richness.
- Salt
Used sparingly to adjust seasoning, it highlights the natural flavors of all the components.
- Green onions
Sliced for garnish, they add fresh crunch and a burst of color right before serving.
HOW TO MAKE 10-MINUTE EGG FRIED RICE
Let’s break down the steps to whip up this speedy, satisfying egg fried rice. You’ll be amazed at how quickly simple ingredients transform into a flavorful, restaurant-style dish.
1. Heat a large skillet or wok over medium-high heat. Add 1 tablespoon of vegetable oil and swirl to coat the pan, ensuring a hot, slick surface for cooking.
2. Crack the eggs into a bowl and lightly beat them until the yolks and whites are just blended. Once the oil is shimmering, pour in the eggs and scramble quickly with a spatula. Cook for 1–2 minutes until fully set but still tender. Remove the eggs to a plate and set aside.
3. In the same pan, add the remaining tablespoon of oil. Toss in the chopped onion and sauté for 2–3 minutes, stirring occasionally, until the pieces turn soft and translucent.
4. Add the minced garlic and let it cook briefly—about 30 seconds—until you can smell that classic, fragrant hint of garlic without letting it brown too dark.
5. Stir in the thawed peas and keep them moving for 2 minutes, giving them a chance to heat through and retain a bright green color.
6. Add the cold rice to the pan, using your spatula to break up any clumps. Move everything around so each grain meets the hot surface, ensuring a light coating of oil.
7. Pour in the soy sauce and sesame oil, then sprinkle the black pepper and salt evenly over the rice. Stir thoroughly to combine, making sure every grain turns a rich, appetizing shade.
8. Return the scrambled eggs to the pan and mix gently with the rice and veggies. Continue to stir-fry for another 2–3 minutes, letting the edges of the rice get a slight crisp.
9. Remove the skillet from heat and garnish with sliced green onions, letting that fresh pop of flavor and color finish the dish.
10. Serve piping hot and dive into your quick, delicious egg fried rice!
SERVING SUGGESTIONS FOR 10-MINUTE EGG FRIED RICE
Once your 10-Minute Egg Fried Rice is sizzling off the stove, get creative with serving ideas that take this humble dish to the next level. Whether you’re plating for a solo lunch or feeding a hungry crowd, these approaches ensure every bite feels thoughtful and exciting. Experimenting with condiments, textures, and accompaniments can turn a simple stir-fry into a memorable meal that’s as Instagram-worthy as it is delicious.
- Family-Style Bowl
Transfer the hot fried rice into a large, shallow serving dish and top with extra green onions. Let everyone help themselves, tossing in chili oil or soy sauce from communal bowls for a fun, interactive dinner.
- Lettuce Wraps
Spoon warm rice into crisp butter lettuce leaves for a light, handheld twist. The cool crunch of the lettuce contrasts beautifully with the savory grains, creating a low-carb, wrap-style snack.
- Spicy Kick
Drizzle Sriracha or sambal oelek over individual servings and sprinkle with toasted sesame seeds. This adds heat and texture, perfect for spice lovers craving an extra punch.
- Side Dish Upgrade
Serve small portions alongside grilled meats, steamed fish, or tofu. Add a wedge of lime or a side of pickled vegetables to complement the rice’s savory depth and brighten the overall plate.
HOW TO STORE 10-MINUTE EGG FRIED RICE
After enjoying a hearty helping, you might wonder how to keep your leftover egg fried rice tasting just as fresh. Proper storage not only preserves flavor but also prevents sogginess or loss of texture. Whether you plan to eat it the next day or freeze it for later, these tips will help you maintain that signature, restaurant-style quality.
- Cool Completely Before Storing
Allow the fried rice to come to room temperature (no more than 1 hour out) before transferring to an airtight container. This prevents condensation and soggy rice.
- Refrigerator Method
Store in a sealed container for up to 3–4 days. When reheating, add a splash of water or a drop of oil and heat in a skillet over medium heat, stirring constantly to restore fluffiness.
- Freezing for Longer Shelf Life
Portion the rice into freezer-safe bags or containers, removing as much air as possible. Label with the date and freeze for up to 2 months. Thaw overnight in the fridge before reheating.
- Reheat with Extra Moisture
Whether frozen or refrigerated, sprinkle a small amount of water or broth over the rice before microwaving or stir-frying. This step helps the grains plump up and avoids dryness.
CONCLUSION
When time is tight but hunger is growling, this 10-Minute Egg Fried Rice stands by as your trusty kitchen hero. We’ve explored how cold, leftover rice transforms into a lightly crisped masterpiece, infused with the savory richness of soy sauce, the nutty whisper of sesame oil, and the vibrant textures of eggs, onions, and peas. From prep to plate, the entire process takes less than fifteen minutes—perfect for busy weeknights, spontaneous lunch plans, or even meal prep staples. Remember that this recipe is endlessly adaptable: toss in extra veggies, swap in proteins like chicken or shrimp, or dial up the spice to suit your mood. It’s a canvas for culinary creativity, designed to rescue leftover rice while delivering maximum flavor impact.
Feel free to print this article or save it in your digital recipe box for those days when you need a quick, satisfying meal. Below, you’ll find a handy FAQ section to answer any burning questions about technique, substitutions, or troubleshooting. If you give this a try, I’d love to hear how it goes! Drop a comment, share your tweaks, or ask for clarification on any step. Your feedback and stories make this cooking adventure even more rewarding, and I can’t wait to see what delicious variations you come up with!
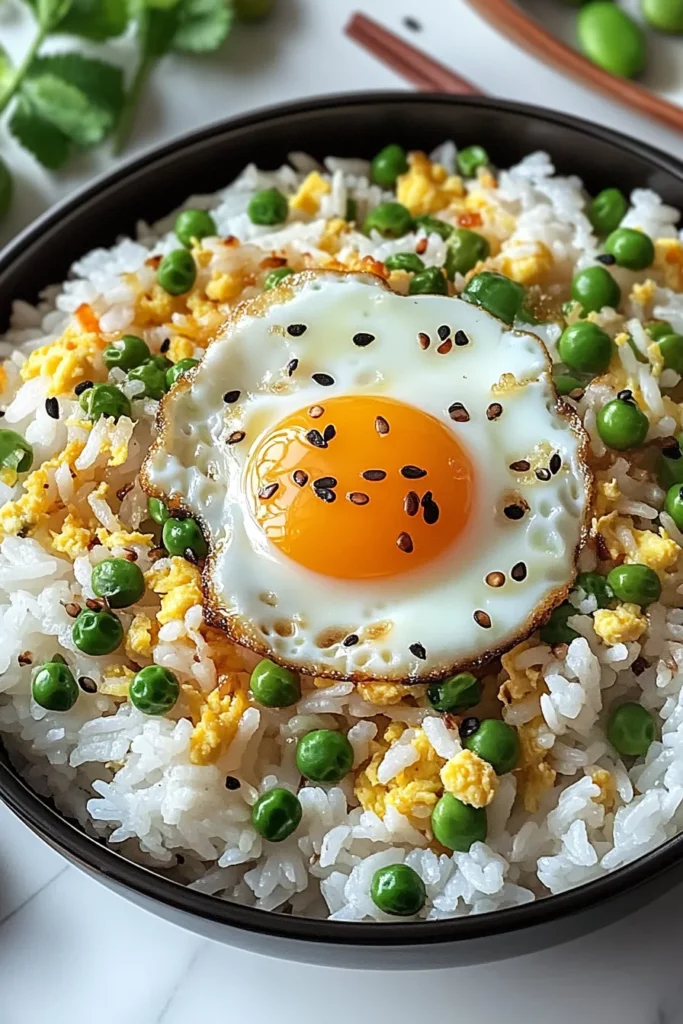

10-Minute Egg Fried Rice
Description
The tender grains of rice get kissed by rich soy and sesame notes, studded with soft scrambled eggs and sweet peas, sizzling to perfection in just 10 minutes.
Ingredients
Instructions
-
Heat a large skillet or wok over medium-high heat. Add 1 tablespoon of vegetable oil and swirl to coat the pan.
-
Crack the eggs into a bowl and lightly beat them. Once the oil is hot, pour the eggs into the pan. Scramble the eggs quickly until they are fully cooked, about 1-2 minutes. Remove the eggs from the pan and set them aside.
-
In the same pan, add the remaining 1 tablespoon of oil. Add the chopped onion and sauté for 2-3 minutes until softened and translucent.
-
Add the minced garlic and cook for another 30 seconds until fragrant.
-
Stir in the peas and cook for another 2 minutes, allowing them to warm through.
-
Add the cold rice to the pan, breaking up any clumps. Stir well to mix the rice with the vegetables.
-
Pour in the soy sauce and sesame oil, and sprinkle the black pepper and salt over the rice. Stir to combine, ensuring the rice is evenly coated with the sauces.
-
Add the scrambled eggs back into the pan and mix them in with the rice. Continue to stir-fry for 2-3 more minutes, allowing all the ingredients to heat through and slightly crisp up.
-
Remove from heat and garnish with sliced green onions.
-
Serve hot and enjoy your quick, delicious egg fried rice!
Note
- This recipe is perfect for using up leftover rice, as day-old rice fries up better and gives a nice texture.
- Feel free to add more vegetables like carrots, bell peppers, or corn for extra flavor and color.
- For a non-vegetarian version, you can add cooked chicken, shrimp, or bacon to the fried rice.
- Adjust the soy sauce to your preferred saltiness level. If you want a gluten-free version, use tamari instead of regular soy sauce.